Showing posts with label charity quilt. Show all posts

December 7, 2018

Teenage I Spy Quilt ➕ Block Tutorial

I have a quilt to share that I hope will make a teenage girl very happy who is living in foster care at the Miracle Hill Children's Home in the upstate of South Carolina. 

This photo was taken about three weeks ago when there were still leaves on the trees and some pretty colors.


I assembled the top while I was at the Quilters of South Carolina retreat back in October and my friend, Mona, took some photos for me.  

The retreat took place at the White Oak Baptist Conference Center for the last time as we will be trying out a new venue next year. 

Here, the wind did not want to corporate but I wanted to show the grounds with the lake in the background.   

A friend in my guild, Michael Sullivan, quilted it for me using and all-over design, Moonflower.  I was very pleased how it turned out.  

7  x 6 block layout
Finished quilt size, 56" x 72"

Thank yous go out to all of my Bee Inspired bee mates who generously made blocks for me.  I had to make less than 10 of the 42 blocks.

I asked them to choose any novelty print and frame them with solids in pink, purple, blue, aqua or gray.  Their fabric combinations were thoughtfully chosen.  There's a bunny watching out in the top left corner along with some feathers and flowers.  


And, some coffee cups...  The leaves are full of color.  


There are even sock monkeys, cat faces and more flowers.  


And, bicycles, pencils and Mini  Pearl bracelets.


And, even some numbers and math equations.  


And much, much more.


This photo is after the quilt was blocked and trimmed.


For the binding, I chose a gray with a little pattern in it.  I sewed it entirely by machine. 


I chose a Tula Pink print, Clear Skies, for the backing.


I even did some pattern matching.  The seam runs horizontal through the chartreuse circles.  Can you find it?  

  
Here's what the backing looks like on the whole quilt.  


Well I did promise an I Spy block tutorial, so let's get to it!

I Spy Block Tutorial {Teenage Version}
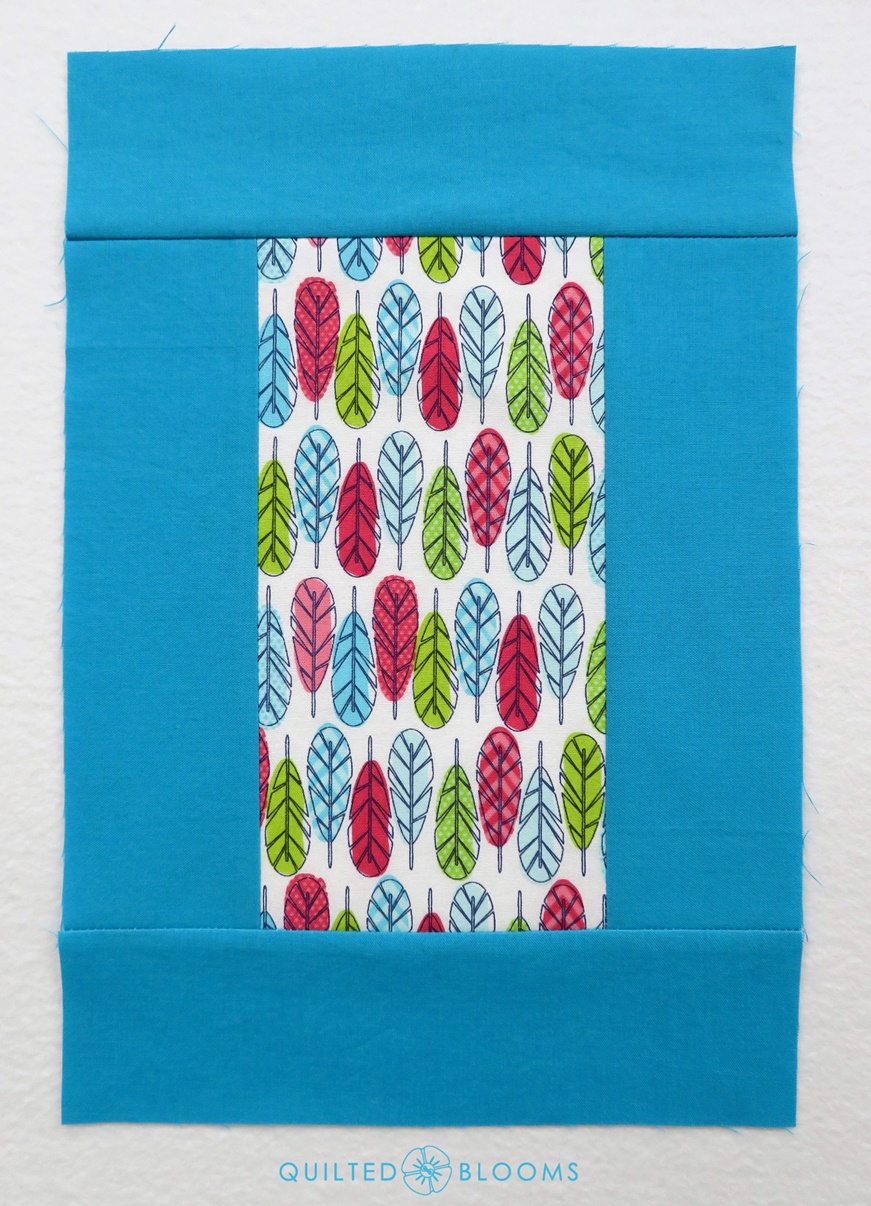

Finished block size 8 x 12, (unfinished 8 1/2" x 12 1/2")

I spy block

Fabrics - Block Center


For the block center anything goes.  You could use novelty prints, low volume prints, or anything that inspires you.

Fabrics - Framing Fabric


For the frames or borders, I asked my bee makes to please use solids in the following colors: Pink, Purple, Blue, Aqua, and Gray - Feel free to use lights, mediums and darks in any shades or tones.

My only prerequisite was that I would like for the fabrics to be prewashed.  Prewashing is easy if you follow my tutorial for prewashing a small amount of fabric.

Cutting the Fabric


From the novelty fabric used for the center of the block, cut:

(1) rectangle 4 1/2" x 8 1/2" 

From the framing fabric, cut:

 (4) rectangles 2 1/2" x 8 1/2" 
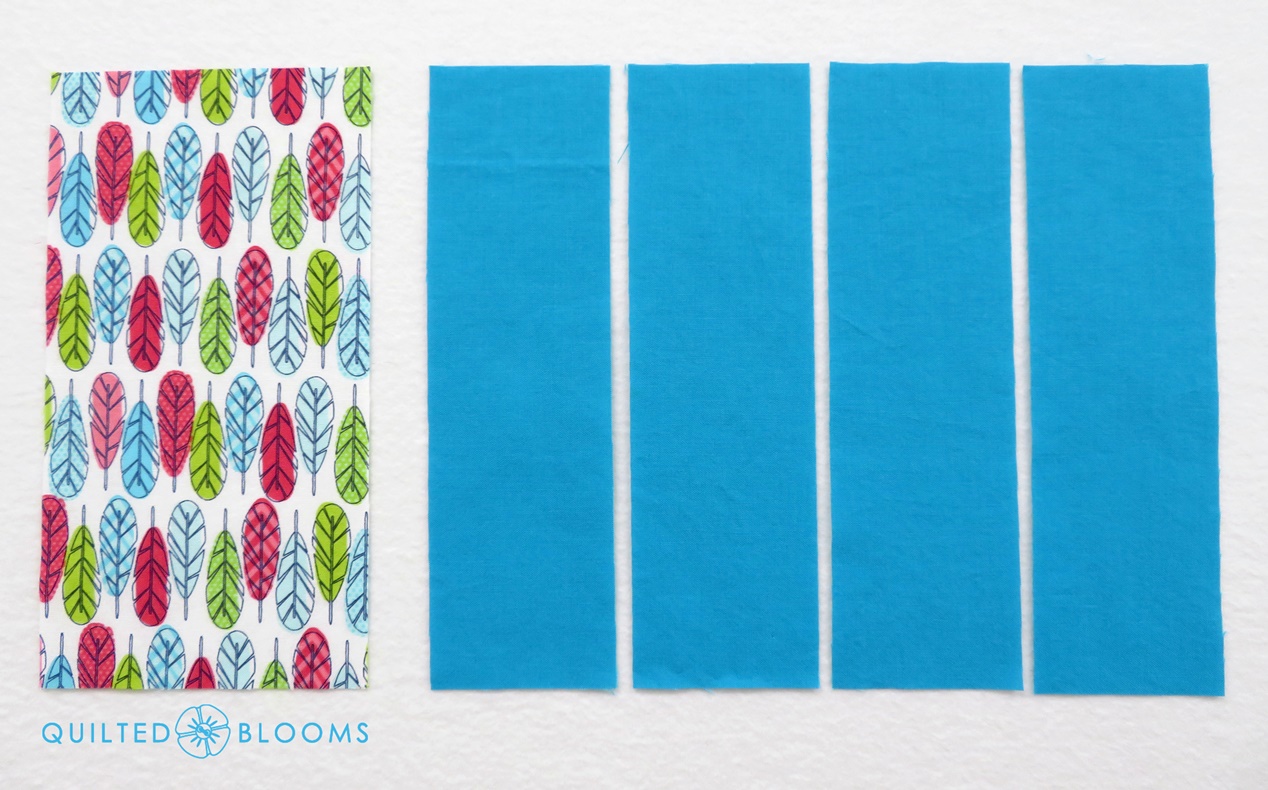
I spy parts

Piecing


1)  Sew (1) framing rectangle to each of the long sides of the central rectangle.  Press seams towards the framing fabric.

Tip:  When sewing the framing rectangles onto the central rectangle, sew with the framing rectangles on the bottom.  That way, if the central rectangle was cut on the lengthwise grain, the framing rectangles will have less opportunity to stretch as you are piecing.
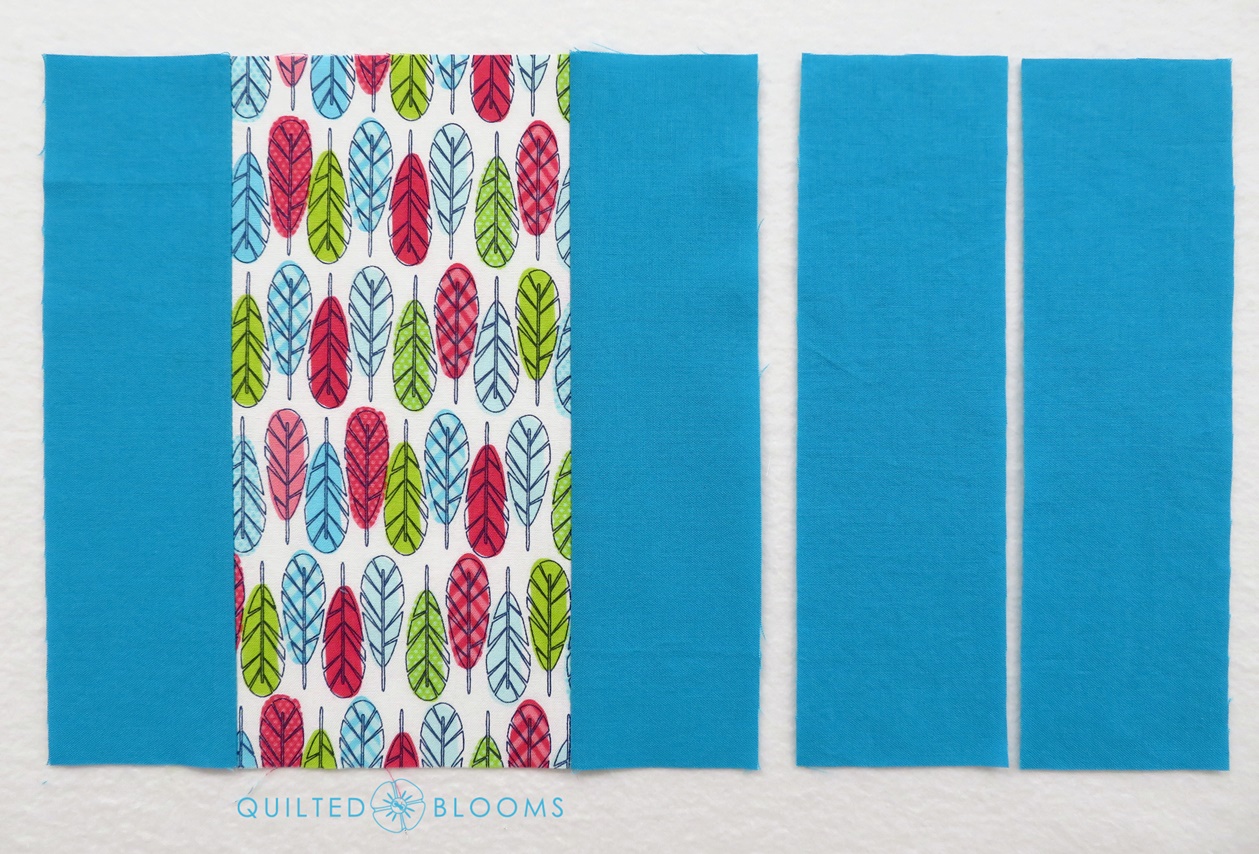
  I spy sides

2)  Sew the remaining (2) rectangles to the top and bottom of the block and press the seams, again, toward the framing fabric.

And, ta-da, you are done!  Here are some I Spy blocks I made.

  I spy blocks 2.jpg

If you make some I Spy blocks, please share them on Instagram using the hashtag #TeenageISpyBlock and tag me @QuiltedBlooms.

This I Spy block tutorial was originally posted by me on the Bee Inspired blog in March 2018. This rectangle block is used by permission from a fellow Greenville MQG member, Didi at DidiQuilts.com.

I'll be linking to final Finish It Up Friday as Amanda Jean from Crazy Mom Quilts made the announcement earlier this week that she is no longer going to run her inspiring blog as a business.  Thanks Amanda Jean and I wish you all the best in whatever is next for you! 


April 21, 2017

Block Recycle Challenge

I recently finished a quilt using this orphan quilt block as a starting point.  In this tutorial for Improv Pineapple Blocks, its called a half log cabin block, but seems more like a quarter pineapple block to me.

The Greenville MQG issued a recycle block challenge to make something quilted using an orphan block donated through our block of the month program.


Half Log Cabin or Quarter Pineapple quilt block

It was more difficult finding blues and greens that coordinated than I thought it would be.  The blues had a denim or chambry look to them.  I collected some possibilities.


The green was fairly bright and I really had to search for some almost kelly greens to coordinate.  That yellow on the right didn't make the cut.


Now, what was I going to do with this block?  I decided to carry out the 'pineapple' theme and just keep adding logs and triangles until I had a large enough top for a comfort quilt to use in our charity project.

I forgot to measure the size of the original block, but it was around 11" or 12" square.  Wonky logs would have been more modern, but I was limited on time and fabric and just kept the logs fairly straight.  Here's the top after a few rounds.


And after a couple more logs...


And, here's the completed top...


I spray basted it late one night out on the porch, brought it in and hoped a quilting design would come to me overnight.


This print by Studio E was perfect for the backing.  The fabric even says, 'Reuse, Reduce and Recycle' which I found at a yard sale for I think a $1.  It really looks better than it photographed.


I decided to just quilt in the ditch around each log and quilt diagonally across each log, all done with the walking foot.  For the bigger logs, you can't see it here, but I did add a couple more lines in between but didn't cross over the triangles.


Here's the finished quilt after it's been bound and washed.  I added the binding by machine, the same way as I explained in this post.

I quickly took the photo before I headed to the meeting so it's not the straightest.

Recycle Block Challenge Quilt
I mentioned this was a challenge and an outside judge, Melinda Hoffman, who is an artist friend of Faye Jones, the challenge coordinator. was invited to pick the winners.

Just look at the tote bag I received.  Faye, a talented artist herself, painted this and somehow made decals to apply to purchased totes.  And you notice in the upper right hand corner...first place. :)  I will put this tote bag to good use in Paducah next week.

You can see all the challenge entries here along with the other fabulous prizes and winners.

Decal made from original artwork by Faye Jones

Quilt Stats:
  • Finished size: 38" x 38" 
  • Pattern: Half log cabin tutorial by MQG
  • Fabrics: Various including Cotton & Steel, Carolyn Friedlander, Anna Maria Horner, Kona solids, Kaffe Fassett and more
  • Thread: Aurifil 50 wt., 2725 light wedgewood
  • Quilting design: In the ditch and straight line quiting with walking foot
  • Batting: 100% Cotton Warm & White by the Warm Company
  • Completed: April 2017

Linking to Finish It Up Friday, Finished or Not Friday, Whoop Whoop Friday, and Show Off Saturday