I have a quilt to share that I hope will make a teenage girl very happy who is living in foster care at the
Miracle Hill Children's Home in the upstate of South Carolina.
This photo was taken about three weeks ago when there were still leaves on the trees and some pretty colors.
I assembled the top while I was at the
Quilters of South Carolina retreat back in October and my friend, Mona, took some photos for me.
Here, the wind did not want to corporate but I wanted to show the grounds with the lake in the background.
A friend in my guild, Michael Sullivan, quilted it for me using and all-over design,
Moonflower. I was very pleased how it turned out.
 |
7 x 6 block layout
Finished quilt size, 56" x 72" |
Thank yous go out to all of my
Bee Inspired bee mates who generously made blocks for me. I had to make less than 10 of the 42 blocks.
I asked them to choose any novelty print and frame them with solids in pink, purple, blue, aqua or gray. Their fabric combinations were thoughtfully chosen. There's a bunny watching out in the top left corner along with some feathers and flowers.
And, some coffee cups... The leaves are full of color.
There are even sock monkeys, cat faces and more flowers.
And, bicycles, pencils and Mini Pearl bracelets.
And, even some numbers and math equations.
And much, much more.
This photo is after the quilt was blocked and trimmed.
For the binding, I chose a gray with a little pattern in it. I sewed it entirely by machine.
I chose a Tula Pink print, Clear Skies, for the backing.
I even did some pattern matching. The seam runs horizontal through the chartreuse circles. Can you find it?
Here's what the backing looks like on the whole quilt.
Well I did promise an I Spy block tutorial, so let's get to it!
I Spy Block Tutorial {Teenage Version}
Finished block size
8 x 12, (unfinished
8 1/2" x 12 1/2")
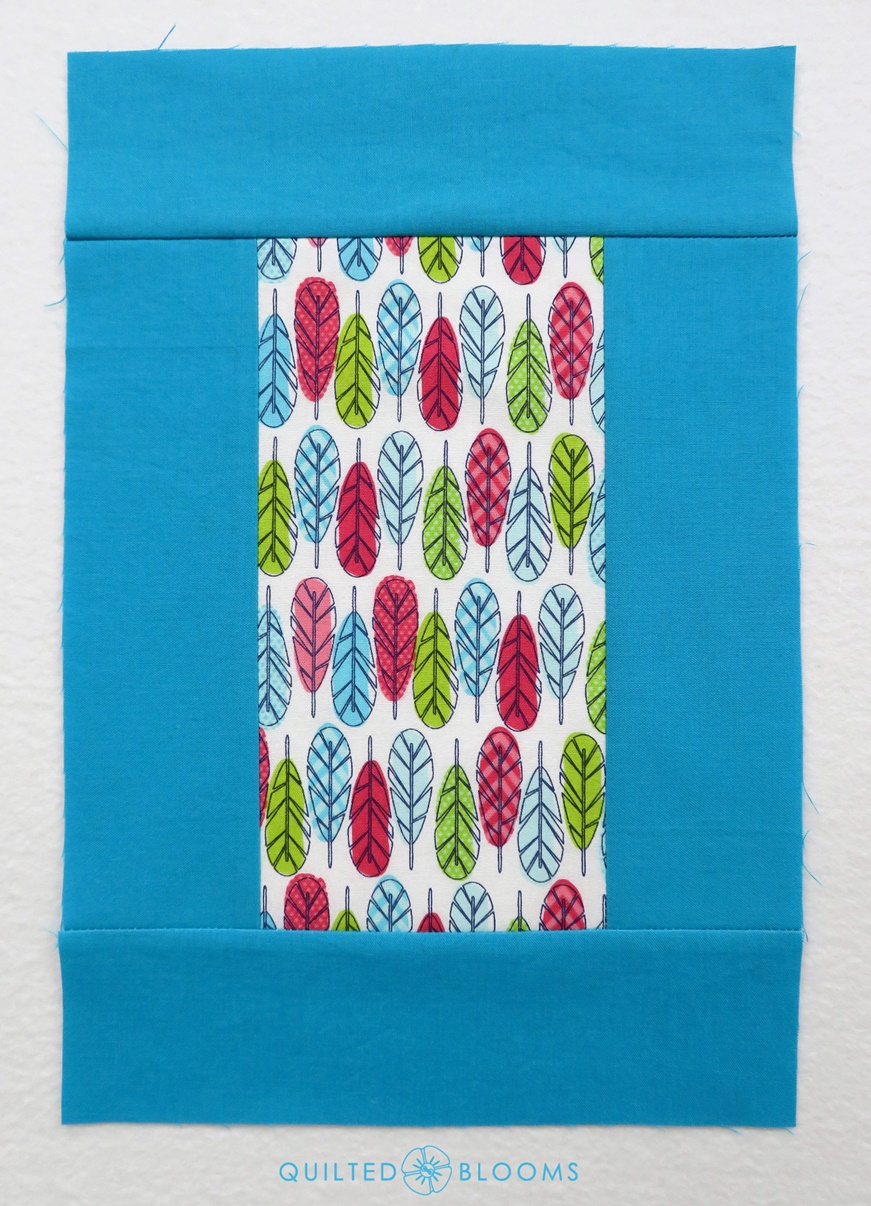
Fabrics - Block Center
For the block center anything goes. You could use novelty prints, low volume prints, or anything that inspires you.
Fabrics - Framing Fabric
For the frames or borders, I asked my bee makes to please use
solids in the following colors:
Pink, Purple, Blue, Aqua, and Gray - Feel free to use lights, mediums and darks in any shades or tones.
My only prerequisite was that I would like for the fabrics to be prewashed. Prewashing is easy if you follow
my tutorial for prewashing a small amount of fabric.
Cutting the Fabric
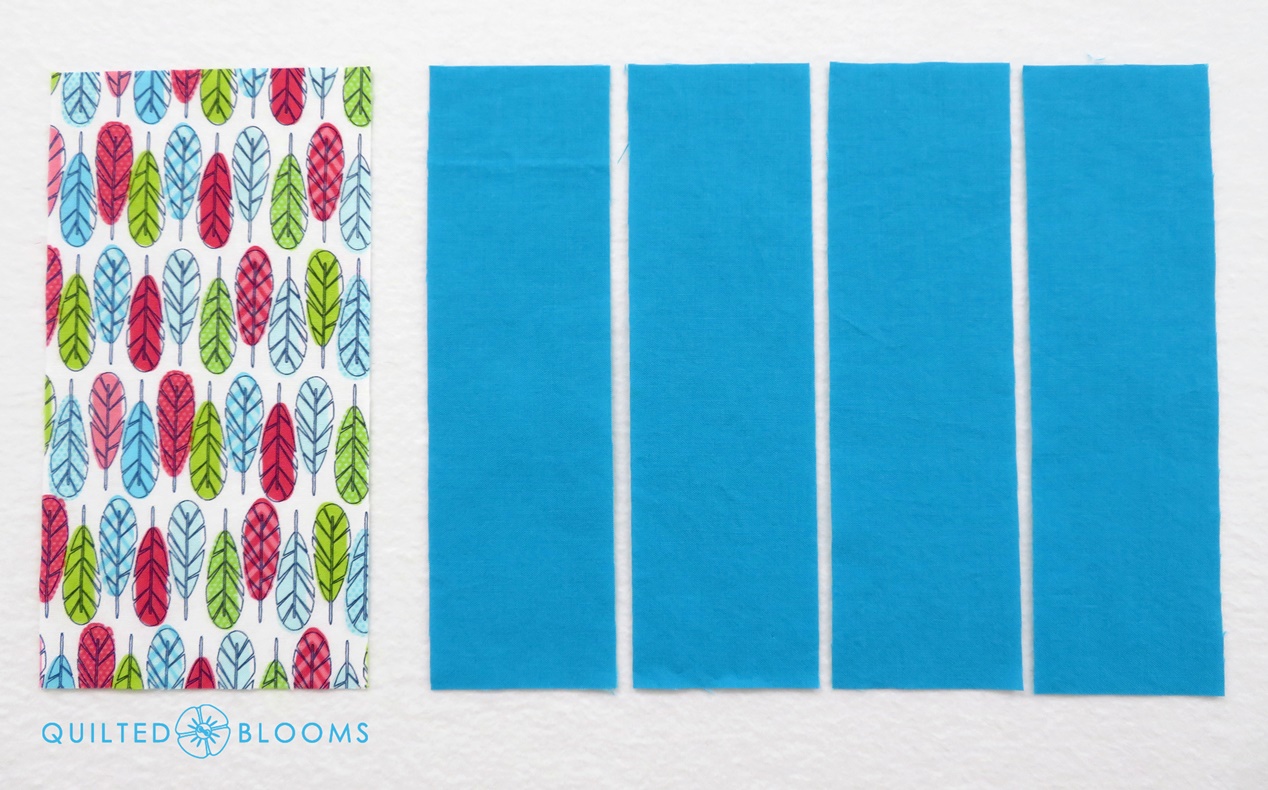
From the novelty fabric used for the center of the block, cut:
(1) rectangle 4 1/2" x 8 1/2"
From the framing fabric, cut:
(4) rectangles 2 1/2" x 8 1/2"
Piecing
1) Sew (1) framing rectangle to each of the long sides of the central rectangle. Press seams towards the framing fabric.
Tip: When sewing the framing rectangles onto the central rectangle, sew with the framing rectangles on the bottom. That way, if the central rectangle was cut on the lengthwise grain, the framing rectangles will have less opportunity to stretch as you are piecing.
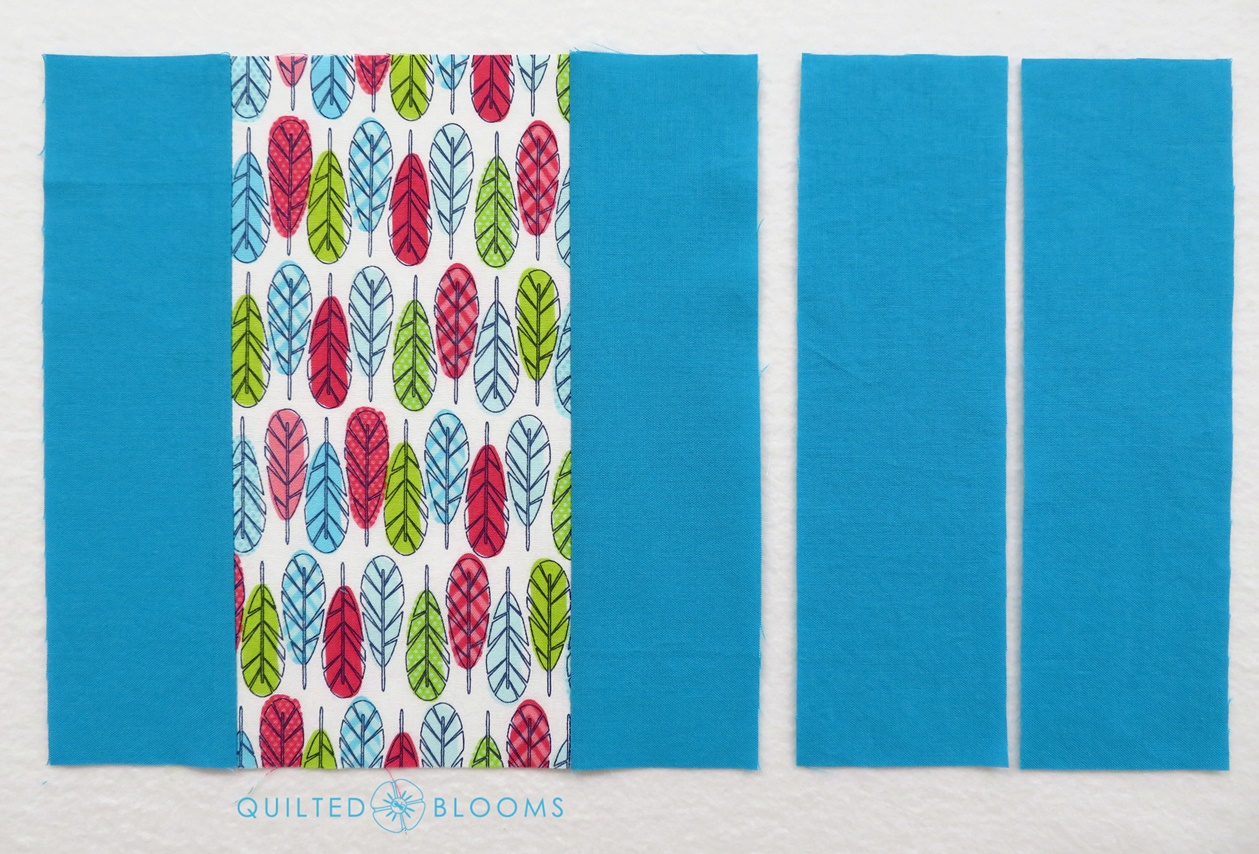 2)
2) Sew the remaining (2) rectangles to the top and bottom of the block and press the seams, again, toward the framing fabric.
And, ta-da, you are done! Here are some I Spy blocks I made.

If you make some I Spy blocks, please share them on Instagram using the hashtag
#TeenageISpyBlock and tag me
@QuiltedBlooms.
This I Spy block tutorial was originally posted by me on the
Bee Inspired blog in March 2018. This rectangle block is used by permission from a fellow Greenville MQG member, Didi at
DidiQuilts.com.
I'll be linking to final Finish It Up Friday as Amanda Jean from
Crazy Mom Quilts made the
announcement earlier this week that she is no longer going to run her inspiring blog as a business. Thanks Amanda Jean and I wish you all the best in whatever is next for you!